
Just about any photographer at some point will travel to a location and photograph. That is what we do. Sometimes these locations are remote and sometimes they are just in the next town or countryside. Our captured photons are precious to us and before we can turn them into the works of art we saw when we captured the light, we need to bring them home safely. We carry extra cards, so that we do not run out of space and make sure we are able to capture that special moment. At some point we either start to run out of storage or we reach a point or have an experience that makes us realize we might want to back up and make a copies in case something happens. Something always happens, maybe not today or tomorrow but it will. Having backups is essential, especially when working for a client. Our bread and butter relies on us bringing home the goods. Many of us will travel with a laptop, then we are faced with the problem of once they are downloaded, we can format and reuse the memory card, but now we still only have one copy, or the other scenario is that we do not want to travel with a laptop and need someway of making copies to protect our precious images. Having redundant copies is essential, we do it at home, or if you aren’t you should be! Making backups is a critical function of being a digital photographer. We can carry small portable hard drives and hook them up to the laptop and make a copy of the folder. This is a good basic practice, some of us will carry two small drives and make two backups, safety first!
What about the other scenario, in which we do not want to carry a laptop or perhaps do not own one? A tablet will only hold a few images and certainly not a full days shooting or even close to multiple days, unless you are extremely frugal about capturing photons. I mean really, who only takes a dozen photographs? I am sure there are people out there but I know it would not work for me. I like to capture different angles, compositions, exposures etc. and soon the memory cards are getting full. It is not like the old days of film, where each shot was an expense, it still kind of is but not in the same sense. Shoot, chimp and check the histogram, doh not right, adjust and shoot again, that is the way in the digital age. I have found a couple of different devices that allow you to directly download a camera memory card and store them on a portable disk. They are very portable, recharge quite quickly and easily and are able to store a lot of data, good for a trip or while in the field. While they can be used standalone as the only backup on a trip, I use them as a secondary backup while out and about capturing images. Another advantage is even if you are in the field, where it may not be possible to fire up the laptop you can still download and make a backup.
I have two portable backups, one I have had for about year or so and the other was just recently announced and acquired. The first is the Colorspace UDMA2 portable storage device and the other is the Western Digital WD My Passport Wireless. They are two different devices although they both provide portable storage. Why did I get two? Well they have different features, the Colorspace UDMA2 (UDMA2) had a small lcd screen and and is accessed via some buttons below the screen, it has card slots for SD, Compact Flash cards. The WD Passport Wireless (Passport) has no screen, it has two buttons on the top and two leds on the front, and one SD card slot on the side. So the immediate advantage of the UDMA2 is the ability to have a menu screen and the ability to download CF and SD cards. The Passport is limited to only SD cards. I have cameras that use CF and SD but lately my main camera, the Fuji X-T1 uses the SD cards. Both units have WiFi capability, both have internal hard drives. Both units can be directly connected to computer via USB, the UDMA2 is USB2 only while the Passport supports USB3 speeds. My interest in the Passport was because of the higher speed when transferring data, although the USB specs are backwards compatible if it is truly USB3 speeds then it would make transferring data a lot faster. And when you have lots of data that can be a factor to consider.
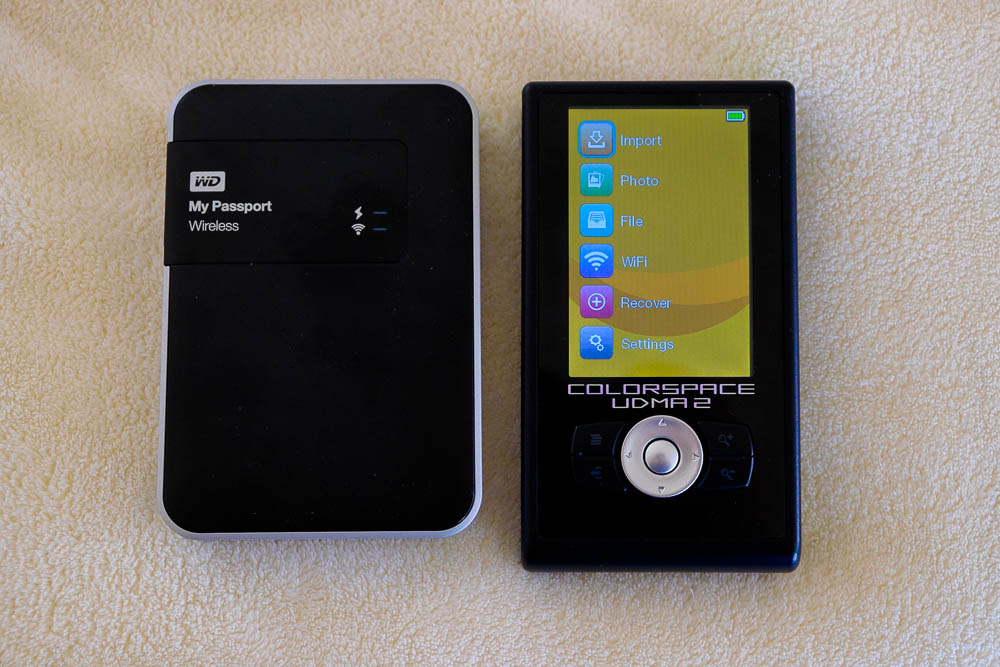
Two types of portable backup storage for images
So how do they compare? Well the physically the UDMA2 is 5.25″x3″x1″ and the Passport is 5″x3.75″x1″ so they are physically similar in size. The Passport has built in wireless and the UDMA2 has a wireless dongle that fits into the mini USB port on the side. As mentioned the UDMA2 has SD, and CF slots, a power switch, two mini USB ports, two leds and power plug port along the sides of the unit. It has a 3.5″ tft lcs screen that has a resolution of 320×480, not real high resolution but it works for the menu system and you can see small thumbnails of the stored images. Both units can stream audio and video to wifi portable devices, this is not something I have used but it is there. The UDMA2 comes with a form fitting soft case with a belt loop and the Wifi dongle and a charger for the onboard battery. The Passport comes with just a USB3 cable, which is very short and wall wort charger, it also does not come with any printed manual, only a few pictures that really do not tell you how to do anything with the Passport. The Passport has two buttons and a USB3 port on the top and single SD slot on the side and two small leds on the front. The Passport is available in two versions, one that is 1TB, the other is 2TB of storage. The UDMA2 is available diskless which means the user needs to go out and get a standard 2.5″ laptop drive and install it themselves. This is what I did, I have a good fast laptop drive and installed it and followed the initialization instructions and it was up and running, a very simple process. They include instructions and the proper size screwdriver, installation is very straight forward. The Passport is preinstalled but must be configured before the first use. Both units can be hooked up to a computer and used as a standard portable storage device, so you can also copy to and from a laptop or desktop. Both units have user upgradeable firmware.
In terms of usage they are similar and also very different. The Passport must be configured by the user before use. In order to do this, they user must connect to the device wirelessly. So either you have to use your laptop or a smartphone to access the device and then configure and setup the passwords and any configuration. The Passport may be setup to automatically check the card reader and start the download of the data. It has a very dangerous option to also delete the contents of the card after downloading, I recommend highly that you do not set this option. Also be sure to set an access password to the device, as soon as you turn on the device it will broadcast an SSID and unless you secure the device others can access it. To download a card, merely insert the card and wait. The wireless led will turn from blue to white and start flashing while it is downloading the data. It will download to a default directory and it will set the folder name to unique name that is generates. The user has no way of making a meaningful folder name for each download. When it is done downloading it will stop blinking and go back to blue, the card can be removed at that time. It will not make a second copy of that card, if you remove and reinsert the card it will look at it and decide it has already made a copy and will not download it again. So no way to make a second copy to make sure it was downloaded. When done you can power down the drive. The Passport does not come with any kind of case.
The UDMA2 is a little more flexible in how it operates, you turn it on and it gives you a menu with items to choose from, like import a card, look at the photos on the drive, another to access the files on a file basis, make copies etc. Another menu item for the wireless. Another unique item is that it has the ability to recover images from a corrupted memory card or deleted memory card. And also has a menu to access setup and configurations. To import images, stick a card in the appropriate slot, select the import menu item and it will check and make sure there is a card and download the card, by default it sets the folder names to card1, card2, etc. After it is done importing it allows you to look at the thumbnails of the image, it will display the basic EXIF information, like the exposure and iso and you can also have it show a histogram. Because it is using the embedded preview image and the screen is low resolution you will not be able to check focus but you can take a rough look and see the important details like exposure and the histogram. You can also browse images after they have been downloaded.
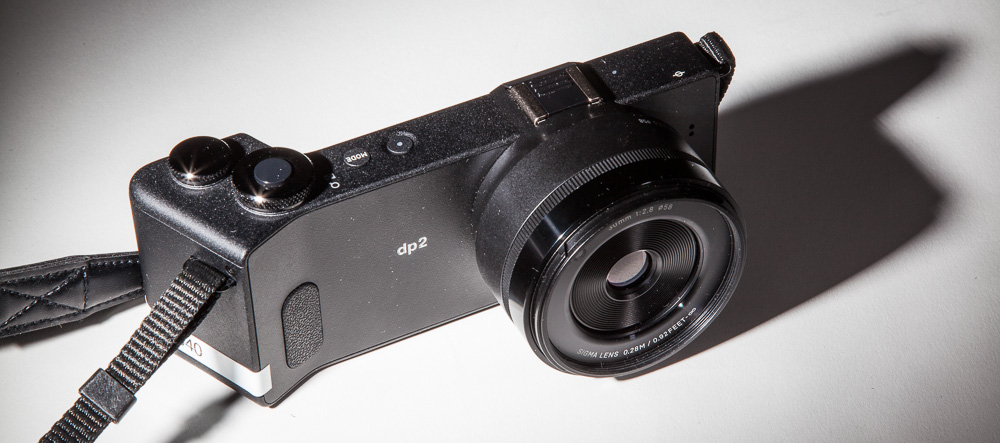
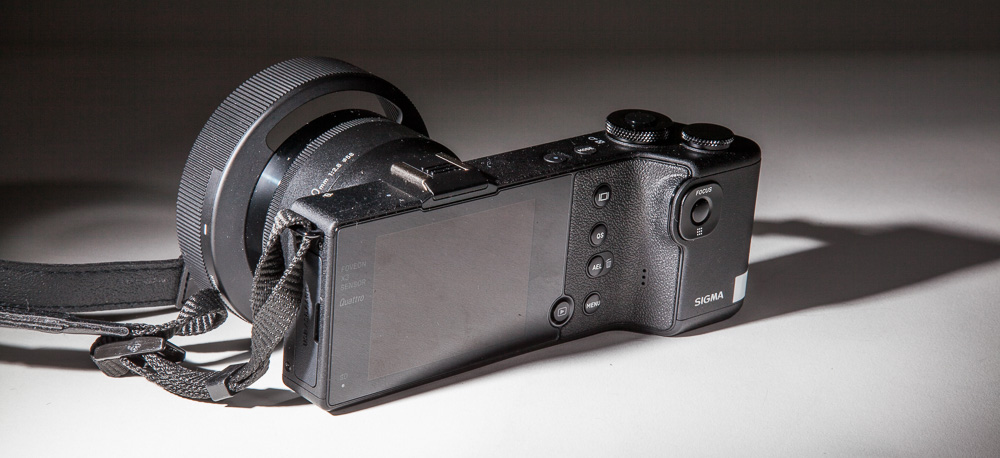
In terms of real world usage of these devices, a big concern is overall speed. I think a lot of people are too preoccupied how fast a device is, but in the case of downloading image from memory cards, I am all over anything with some semblance of speed. Here is where the big difference between these two device lies. For testing purposes I took the same 20 raw files from my Sigma DP2Quattro camera and placed them on two cards, one was rated at 45mb/s and the other 95mb/s. Both were Sandisk SD cards, the slower card being a Sandisk Extreme, while the faster was a Sandisk Extreme Pro. I chose the Sigma files because the raw files are large, around 60mb each and this gave a total of 1.11gb of data to transfer. This turned out to be an interesting test, first there was no difference in download speed between the two cards, in other words, whether it was the 45mb/s card or the 95mb/s card, the download time was the same, while using the built in card readers on the devices. Also in use in the camera, with the Sigma it does not matter but with my Fuji cameras, speed matters. If I use a fast card reader attached directly to my laptop or desktop, the card speed matters. Well that was a bit of diversion, the big difference between the two portable devices was significant. The Colorspace UDMA2 download the card in about 57 seconds, while the WD My Passport Wireless took 2 minutes and 21 seconds, yes 57 second vs 2:21 seconds. That is a big deal, especially when you are downloading a ton of data and multiple cards. On a recent trip to Colorado, my wife and I shot about 119GB of photographs, and taking 2.5x longer was an issue. While on that trip I downloaded the cards directly to the Colorspace UDMA2, then I downloaded them to my laptop, then I used the laptop USB3 direct connection to copy the daily folders over to the WD drive. For me using the SD card download on the Passport was too frustrating.
My other beef with WD My Passport Wireless is that the only way you can set it up is via the wireless interface. In other words if you connect to it via the USB3 cable all you can do is access the drive as a portable drive. You cannot access or configure the wireless setup or any of the options. My other issue with the Passport Wireless is that I had to download the manual and read it before I could set it up. By default automatic download from the SD card is disabled, and wifi security is disabled. They do provide the manual on the drive. The printed foldout guide included was a pointless waste of paper. The included cable is very short, too short in fact, about 12″. A longer charging and interface cable is needed at least for my uses.
So in conclusion I think the Colorspace UDMA2 is the way to go for portable storage with the ability to download images from memory cards, it can deal with two types of cards, has the ability to review the thumbnails and to view exposure information and a histogram. You get to choose how much storage you want and you can easily upgrade it. Battery life on both units is reasonable but the Colorspace UDMA2 charges slower but it has a battery level indicator, it also comes with a nice soft case. The Passport charges quickly but only shows the battery level by a single led color, it will change color with less charge. The Passport is good as an attached portable drive and an SD card reader on a emergency basis. Get the Colorspace UDMA2, it is the most flexible and faster of the two. In my usage the Passport is just another portable drive to attach via usb.


Another year bites the dust…….
Well another year is in the process of slipping into the record books. Overall I think it was a good year, there is always room for improvement but in general things went ok. I am left filled with my usual feelings of not getting everything I wanted to get done, done. Oh well that is part of life’s rich pageant. I think having lots of tasks makes for a busy and fulfilling life, so I am not too worried that not everything was finished, they will be added to the next year’s agenda.
I am not usually one for lists or making “resolutions” but I try to set goals for myself, a subtle but real difference for me. Resolutions always seem like they are more trivial to me, easily broken and ignored. Perhaps they should have more staying power and meaning but that is not what happens. They seem easier to rationalize breaking.
Some of the things I want to accomplish in this coming new year, and in no particular order. I need and want to revamp this website, I really need to add some images and replace a lot of them with better versions and better compositions. I also am going to try and write more articles and perhaps that will get down to a lot more commentary but the goal is to be a lot more active with the blog. I have not done a lot to promote it, mostly because I think the site still needs a lot of work. I also want to refine my image post processing, take my time to do what is best for my sense of vision. I want to refine my vision and be more deliberate with my art. Do more starscapes, and also do more photography in general, but then I always want to do more photography! It is a standard year to year wish, and pretty much goes without saying…..
I also want to make better and more productive use of my time. Time is fleeting and never seems to be a lot of it left at the end of the day, but I want to make it memorable and productive.
It is always easier to second guess and have perfect hindsight, but I am really lucky to have my family, friends, and a decent job. I am also especially lucky to have my wife. She is my companion, fellow photographer, friend, lover and confidant that gets me back on track and helps me stay focused.
And I will leave you with the last sunset for me this year and best wishes to all and hope that the New Year will bring much pleasure and happiness.
Thanks for reading. I will leave you with the last sunset for me in 2014…..