Monthly Archives: July 2012

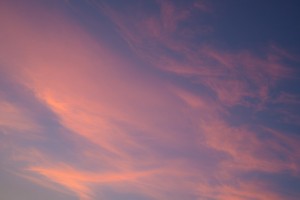
Image of the week #30

Delicate wispy clouds, softly lit by the setting sun….. this weeks subject. Taken with a Fuji X-Pro 1 and 35mm f1.4 lens at f4, 1/75 second at ISO 200.  The sun was well below the horizon and the immediate area around the horizon was muddy looking and not very interesting, but almost straight up  we ended up getting this nice soft pastel palette to finish off the day. Hope you enjoy it.


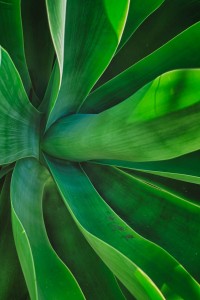
Image of the week #29

This is a re-edit of an image from the Huntington, actually 3 images, done as an HDR, I wanted to try out some new techniques. Taken at the Huntington Library gardens, using the Fuji X-Pro 1, 35mm f1.4 lens at f8.


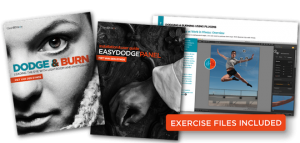
Dodging and Burning – An essential skill and a new ebook to help learn the basics…..

Many of us “old timers” got our start with film cameras and darkroom work with chemicals and all kind of trial and error methods to bring out the details in our photos like dodging and burning. I remember having all kinds of funny shaped cardboard pieces on little pieces of wire and cardboard with cut outs and sometimes just using your hand to help bring out details in a print. In newer terminology to bring the full dynamic range to view on a nice print. Today, of course, we can use computers, so instead of throwing away trial prints we can edit and experiment. Especially with tools like Lightroom, the changes are all parametric and we can always go back and re-edit. You can still do that with Photoshop but it takes a little more effort. Now we use pen tablets and a mouse to apply and change the areas, to make the highlights and shadows as we remember the scene or how we want it to look. All of us go through various learning curves and it is always useful to learn new techniques, so that brings us to the subject of this post. Here is a new ebook, available from the fine people at Craft and Vision. This new ebook is quite a package, it includes an ebook on Dodging and Burning, including lots of examples, but it also includes some Actions for Photoshop and a custom Panel for interacting with the Actions. The sample images discussed in the book are included so that you can follow along exactly with each step. These are set up for Lightroom 4 or Photoshop CS6, while they will work with earlier versions these are recommend because of the improvements that were implemented with the new Image Process in Camera Raw. Trial versions are available for download from Adobe. In case you are wondering about cost, the normal cost for this fine package is $10, however if you use the code “DODGE8” during checkout, it will only be $8. This is only for a limited time, so go and get the Dodge&Burn ebook through this link and use the code before midnight on July 22, 2012. The Craft and Vision book store also has a package deal, for the same limited time, in which you can get 20% off 5+ ebooks from the site, the code is “DODGE20”.  All of the books are worthwhile, however I recommend in addition to the Dodge&Burn, ebook to take a look at Up Close, Exposure for Outdoor Photography, Making the Print, and the Power of Black and White. There are many others that are excellent but those will give you some great information.

So be sure to check out the ebook, and learn how to Dodge and Burn effectively, bring up those shadows and modify the highlights to match your initial vision when you took the picture.  This is an art that does take practice and there is certainly many ways to accomplish the same effects but this book will give you a great start and some insight into improving your images. Not only are the traditional type of modifications discussed but also uses of sharpening, and tonal effects to add some depth to your vision. How to effectively do it in a non-destructive fashion in photoshop, but also how to use some of the tools from Nik Software as a way of making it more efficient.


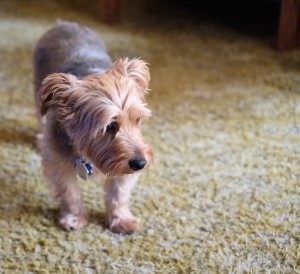
Image of the week #28

This is my sister’s dog, Bailey. Taken in doors and a tough shot, he just will not keep still and everytime I tried to lower the camera down to his level he would run away, so a little stealth was required. Only editing was to crop the image, this is straight out of the camera, ISO6400, 1/60 at f2, taken with the X-Pro 1 and the 35mm f1.4 lens.

Image of the week #27

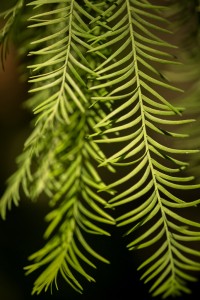
Some cypress leaves at the Fullerton Arboretum. Taken with a Fuji X-Pro 1, 60mm macro lens, f2.4 and 1/280, ISO 200. Took me awhile to get a decent shot of the hanging leaves there was light breeze so they kept swinging around. Enjoy.

Image of the week #26

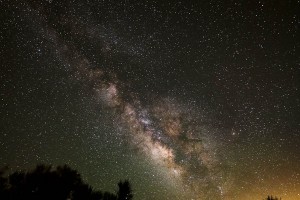
Hard to believe half the year has gone by, I guess that is the sign of getting older, time flies! Here is this week’s image, it was more an experiment but I like how it came out. I got an adapter for my Fuji X-Pro 1 to use my Canon lenses, so this is taken near Temecula with the X-Pro 1 and a Samyang 14mm f2.8 lens, taken at f2.8 and a 30 second exposure at ISO1600. I thought it turned out pretty well, the yellowish glow in the bottom right is the light pollution dome from San Diego. The summer Milky Way always a neat thing to see. Enjoy.