
Around the end of June I got an email from Sigma, the lens and camera manufacturer, announcing their “Try Before You Buy” program for the DP2 Quattro camera. This camera was announced earlier this year and it is a predecessor to their DP Merrill line of compact cameras. These cameras are based on the Foveon sensor which records color for each pixel instead of using a Bayer matrix and interpolating the color. This leads to an increase in resolution, how you classify that is open for some debate. The DP2Q uses a new version of their innovative sensor, in that it records a full resolution luminance and blue chrominance and reduced resolution red and green layer. It still records color for each pixel. They have a lot more information on their website. One of the advantages is that there are no filters in front of the sensor, and one of the disadvantages is the sensor records each color in a different layer, the deeper the layer the lower the intensity of light as it penetrates deeper, and this can lead to more apparent noise. So the sensors do not do real well in high ISO, dim light situations. The benefit of these sensors, is they can deliver a ton of resolution in a small and compact package.
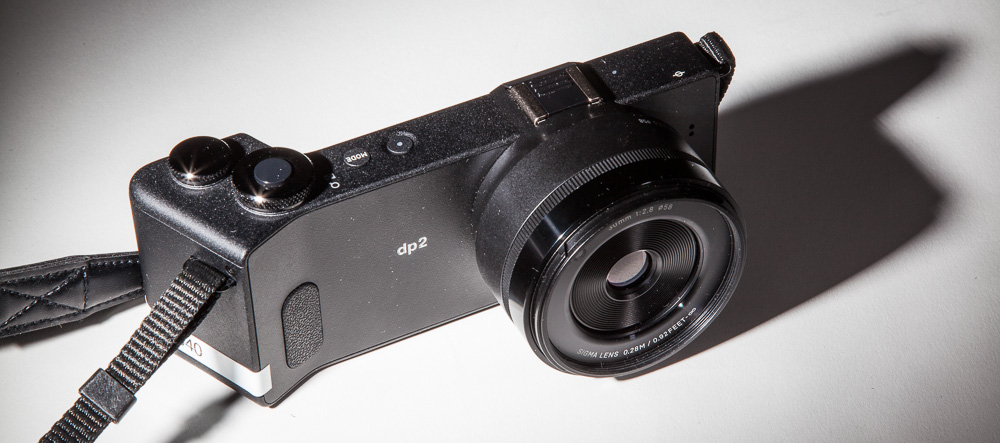
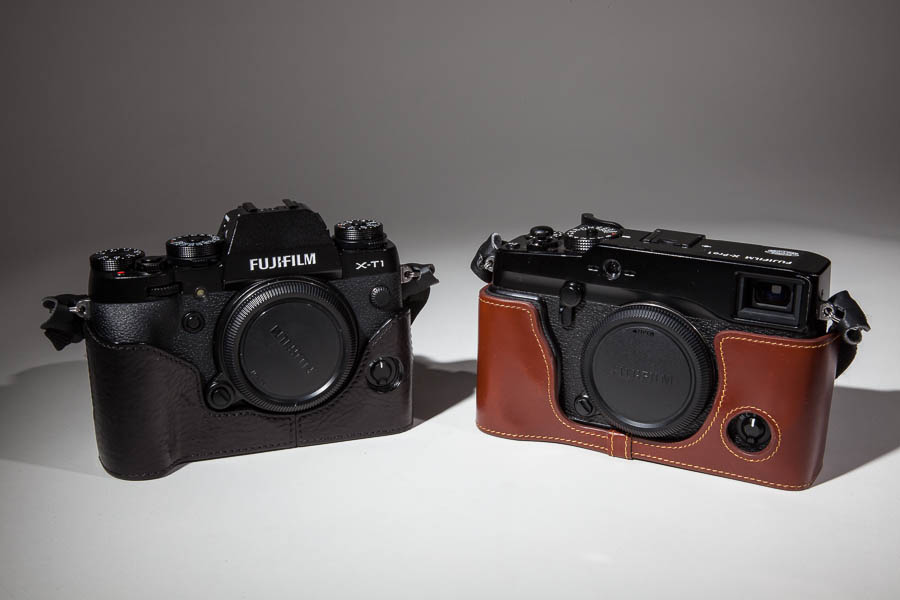
Sigma DP2 Quattro
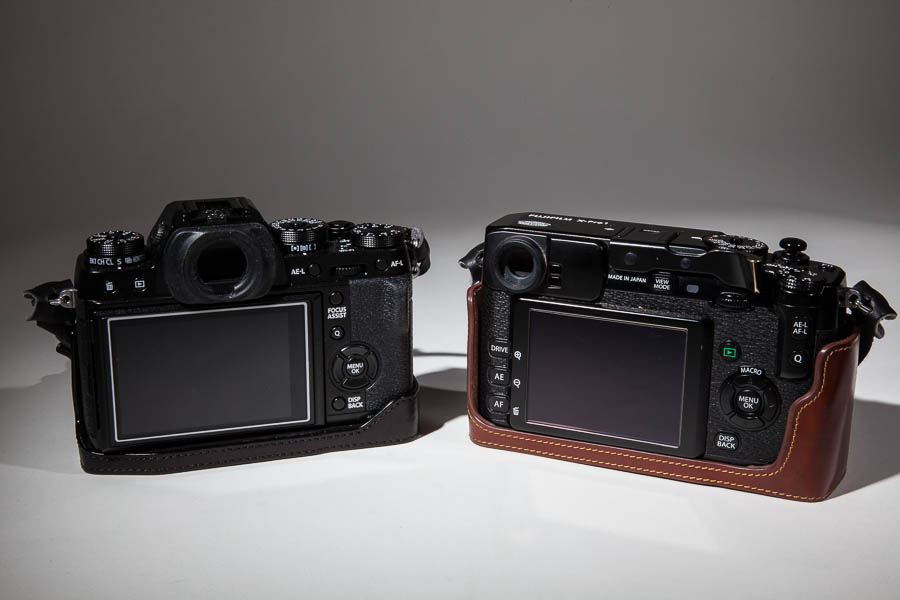
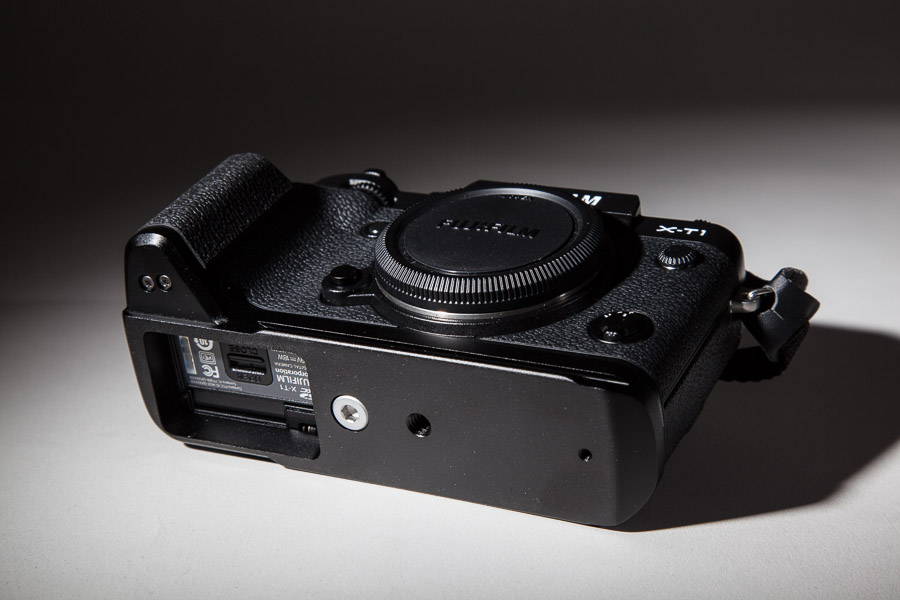
The camera is not your normal looking camera, it is long and thin with an angular grip on the right hand side, which has the shutter button and main controls and also houses the battery. The lens is a fixed lens, 30mm f2.8 and has the equivalent field of view of a 45mm lens on a full frame camera, the crop factor is 1.5x. The grip is very angular and I found it could be uncomfortable to hold in one hand, I suppose you could get used to it but it really lends itself to being held in both hands. There is hot shoe on the top centered over the lens as well as a standard tripod screw socket on the bottom, centered approximately at the centerline of the lens and at the sensor plane. This will at least make it easier for doing panoramas. The memory card is located on the left side of the camera and has a rubber type cover that is a little awkward to remove each time you want to access the memory card. That type of cover is usually used for covering ports that don’t get used often. If you have short fingernails it can be problematic to get the cover off. That was not the best choice. The battery loads from the bottom in the grip area. The top of the camera has a small button for turning the power on and off, a mode button for setting the the various modes, like program, aperture priority, shutter priority or manual mode. There are two rotary switches on the top, the front most one has the shutter button on it and rotating controls one of the settings depending on the mode. The rear most rotary switch controls the exposure compensation or aperture in manual mode. On the back there is a nice 3 inch lcd screen. It is not moveable or tiltable, which is really a shame. The four buttons to the right of the lcd control various functions and includes the menu button. On the rear of the grip area is a button surrounded by a 4 way toggle. It is a directional switch as well as turning the focus mode from manual to autofocus and also for selecting the focus point. The lens also has a small, thin ring that can be used for manual focusing, it is fly by wire type focusing. The hood is a little large but usable and uses a bayonet mount to attach to the front of the lens. The lens is also threaded for 58mm filters.
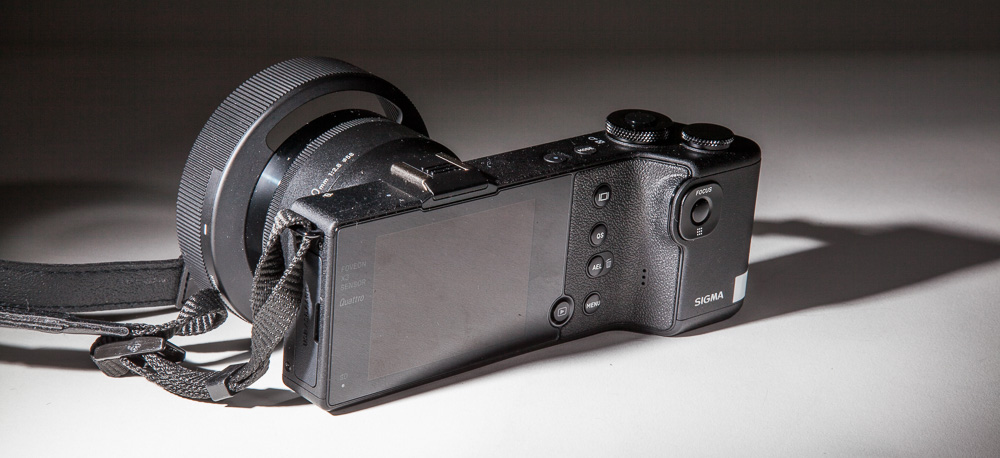
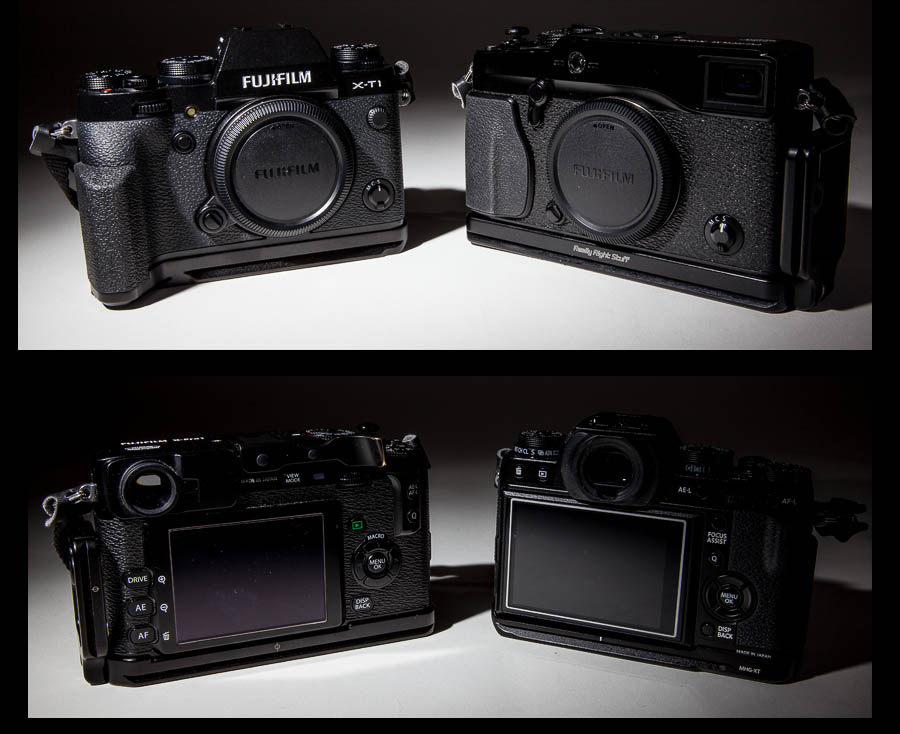
Sigma DP2 Quattro rear view
Field Testing
As I mentioned earlier the grip is not very ergonomic, at least for my hands it put some pressure at points that made it uncomfortable to hold for a long time period in one hand. Using two hands was a lot better, balanced quite well. The camera will focus quite fast if the light is decent, seems to hunt a bit in low light. There are only 9 focus points, 8 points centered around the center point. These are easily accessed, pressing down on the 4 way button and then selecting the point you want and pressing the center button to return from the selection. The drawback is that there are only 9 points. I have been spoiled with DSLR’s and my Fuji X-cameras and I am used to having a lot more focus points. When manually focusing you can press the center button on the 4 way to zoom in and check focus at the selected focus point, this is really nice. Manual focus is “fly by wire” and responsive. There are two zoom factors, but you need to press the center button to exit zoom mode. You can autofocus and then adjust the focus manually, without having to switch modes. When you select manual focus a small distance scale appears near the bottom of the lcd screen. The distances marked are very coarse and not very useful, smaller divisions would have been more helpful.
Once you press the shutter it can take a few seconds before the camera will respond again, even though there is a 7 shot buffer, it is not a fast shooting camera at all. The raw files are huge and do take some time to write out. Having a faster memory card does not help, it still takes a very long time in modern camera times. The camera is a slow and deliberate imaging device that does not lend itself to shotgunning and rapid fire. Raw files were in the 50-65mb range, depending on details, so there is a lot of information being written out to the files. The camera can record jpg, raw and jpg+raw. The jpgs looked nice but for this camera raw is the way to go.
The 3″ lcd on the back of the camera is nice until you get out in the bright sun, then it is very hard to see anything on it, let alone try to focus and frame. This is not that unusual for cameras that rely solely on the rear lcd. Sigma does make an optical viewfinder that slides into the flash hotshoe. This will give you an idea of framing but any exposure or focus information will have to be from the lcd. Sigma did not include one of the viewfinders for the trial. I really wish they had, and I think it will be a necessary item. On the screen you can also turn on a level and tilt indicator, which takes up a fair amount of the image area and can be disabled easily, but it is useful for initial setup for a shot. Also a live histogram can be enabled. I used this a lot, however, even if the live histogram was not showing any blown highlights I was getting blown highlights. So I ended up dialing in exposure compensation of as much as a stop in bright contrasty light. I did not see anyway to enable the histogram or a blown highlight indicator when reviewing images on the lcd, I think this is really an essential feature that has been left out of the camera. The camera also has the ability to bracket shots, which is nice and it is selectable in 1/3 stop increments, up to +/- 3 stops. The down side of bracketing is that it can take awhile to write out all three shots and the camera is not very responsive.
Battery life was reasonable and I seemed to get around 250-300 shots on a battery, however the camera does get noticeably warm. In fact it can get quite warm. I noticed the warmth on the left side where the SD card is located and also on the right side in the flat area next to the lens. It is almost if the processor inside the camera is using the case as a heat sink. On a warm SoCal day it got quite hot, hot enough that the “overheating” icon started flashing on the lcd. This is the first camera that I have that had an overheating icon, let alone having it come on. It did come on several times on a hot day, so I shut the camera off and sat in the shade and let it cool down. It would cool down in about 5 minutes or so with the camera off and then back to shooting.
Raw Conversion Software
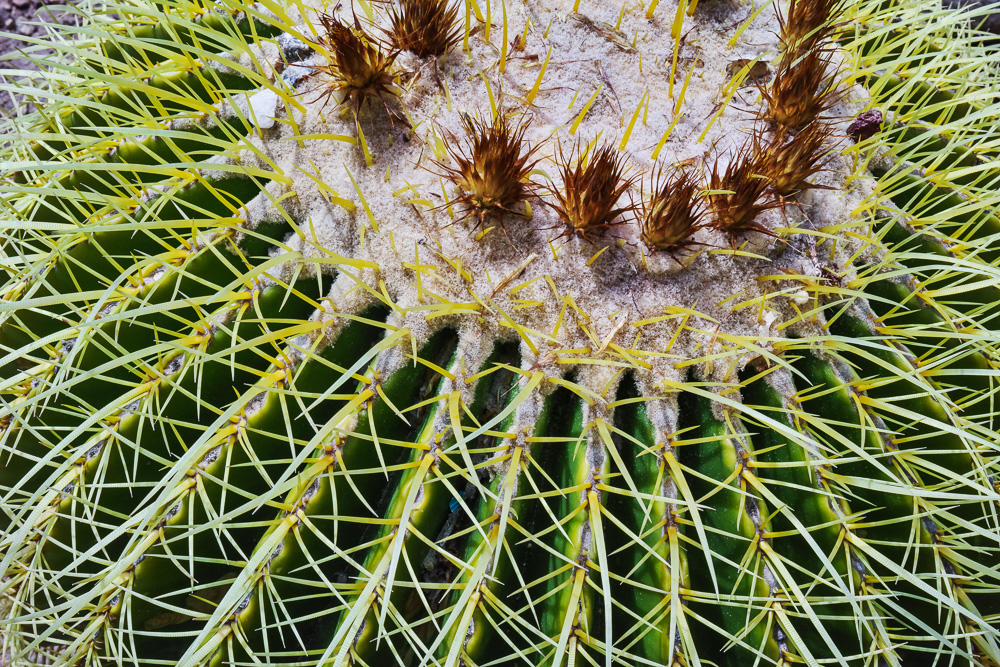
Barrel cactus shot at ISO 100 1/30 @ f16
Raw conversion is another possible issue for some users. The raw format from this camera is only supported by Sigma, the manufacturer. So you will not be able to use Adobe Lightroom or Capture One to process your raw files. You must use Sigma Photo Pro. This software is easily downloaded from the Sigma site and they have versions for PC and Mac. The software seems to have most processing features you might want to use. However it is a very slow piece of software, loading images takes some time, as well as any time you move a slider, it will take 10 seconds or so to update the image. While I realize that there is a lot of data, in today’s world that is slow and can be frustrating when you catch your self not allowing time for the update to catch up. It is not real time adjusting. Also when you load an image it does not reset any of the previous settings that you use, so you need to go and manually resets each group of sliders by pressing on the respective reset buttons. Sigma Photo Pro, or SPP, does have a image browser so you can look at thumbnails and then click on the image to edit, and it will use two monitors if you have a dual monitor setup. One thing I found annoying is that the thumbnails, even in the “large” setting are too small to really see any details. I found that Breezebrowser allowed me to browse the thumbnails and see a larger version so I used that to browse the images to select the ones that I wanted to bring into the editor. The SPP also has a few bugs, at least the current version that I tried during this period. I found that if I set the box to save the image settings while I was saving the file out as tif or jpg, when I went back to edit another image it would crash on loading the image. This was solved by not checking that box, also it seemed that it never saved the image settings anyways, so kind of a moot point. Another thing that was missing was any kind of curves, all adjustments were via sliders. I also found that the sharpening slider quickly resulted in artifacts so I would end up doing any sharpening in a different software. Another “feature” that is annoying, when you start up SPP, it goes out and looks at each and every drive on your system, so if you have some network drives that are “sleeping”, it wakes them up and accesses them. So you sit there staring at and empty framework while all the drives spin up, it does this even if it has never accessed the drive before. The slowness of the software was consist on all the computers I tried it on, originally I was using my laptop and thought switching to the much more powerful desktop would speed things up. Turns out that was not the case at all.
Image Quality
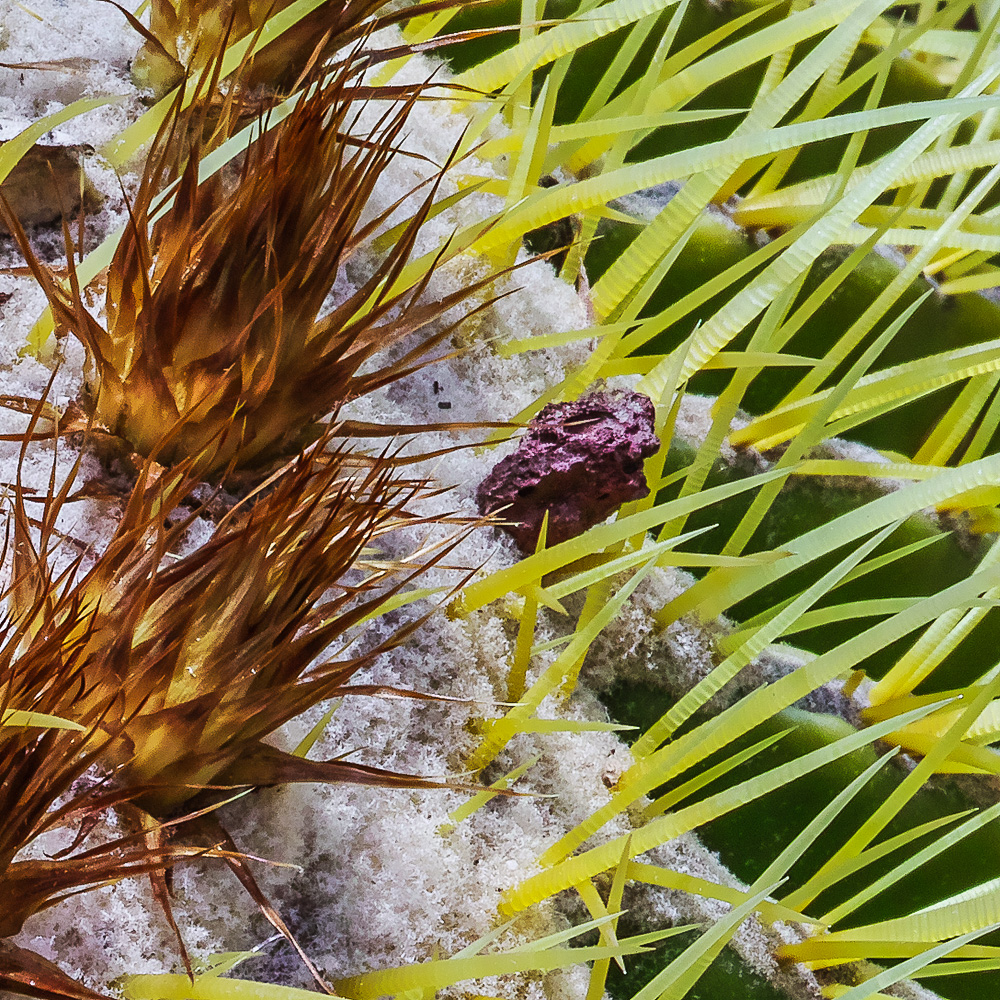
Corner crop of the cactus image, 100% crop from the upper right hand corner
As with any camera the overall image quality is what really matters. After all a camera is just a tool. The size of the image from the DP2Q can be a matter of discussion, the RAW file, straight out of the camera is 5424 x 3616, which is a decent size image. You can save it, after processing in SPP, at a super high setting of 7680 x 5120 in both jpg and tif or you can save it in the default size of 5424 x 2616 or even a half size or double size image. I only save at default size and super sized, I saw no real benefit in the half size or double size images. You can also select 8bit or 16bt for the tif and you can also select the color space. The larger size is very hard to tell from the smaller size. There seems to be a little resolution loss but I did not take enough samples to be completely sure. The larger size is certainly getting closer towards the size of medium format. Since there are no filters at all in front of the sensor elements the resolution and sharpness is quite amazing. That is if the photographer has done their job, any kind of camera shake or instability can affect image quality. So this is one of those cameras that best practices results in better images. In general I found colors to be bright and vivid straight out the processing software, white balance was pretty accurate most of the time, but in some conditions and with people the color balance seemed a little off to me. I am very used to having the white balance nailed, especially with my Fujifilm cameras and with the Canon dslr. If you look closely at the crop of the cactus image to the right, you can see a ton of detail in this image. The crop is from the upper right corner of the previous cactus image. There is no distortion that I could see with this built in lens, optical quality is excellent. The details are really amazing, the crop is at 100% and no additional sharpening was used. Notice the fine details in the fuzz between the spines and the rings on the spines. The bokeh at wide open apertures was quite pleasing and having the f2.8 was nice.
Final Thoughts
Well it was too bad that I had to ship the camera back to Sigma, I had it in hand for less than a week. I wish I had some more time with the camera to really put it through its paces. This was the first Sigma camera that I had used, I have used many of their lenses. That being said I had read about and researched their DP Merrill series of cameras, the one that this DP2Q is replacing, and I often lusted after one. I did understand the shortcomings of those cameras but the images were compelling with lots of detail. This new generation is along those same lines. There are good things, and some not so good things about this camera.
The camera is capable of taking amazing images with fantastic detail, if the photograper is careful and uses best practices. That means careful focusing, stable platform, watching shutter and aperture, taking the time to get things right. It is not a point and shoot. It really needs to be shot at low ISO ranges, the camera is capable of 6400 but I think a more realistic limit for color is about 800, and you can do a lot with black and white images up to ISO 1600, beyond that it is not that great. Image quality degrades, lots of noise and blotching. So keep it low ISO. I put a Arca swiss type release plate on the camera and used a tripod as much as I possibly could, this slowed things down and made it deliberate, which is what this camera needs. It is slow, in a relative fashion compared to other cameras, but not really that slow compared to cameras a few year ago, and those had much lower resolutions. Watching exposure is a must and sometimes bracketing is needed to assure that you captured the image. The controls are well laid out and easy to change and are well thought out, just the grip leaves a lot to be desired. I did try the flash that was sent with the camera, it worked ok and seemed to do an adequate job, not something I would use much with a camera like this, but if you need a quick shot, it is worth it. The software is slow, no matter what machine you run it on, it takes some time to get used to it. The best thing to do with the software is adjust exposure, white balance, lower sharpening and output a 16 bit tif and edit in some other software with more features.
What it really needed was some sort of electronic or mechanical shutter release, there might be one, but unless it uses the USB port I did not see anyplace to attach it. That would be nice to have, especially when using a tripod. Another nice thing to have would be an optional Electronic View Finder, but I don’t see that one happening. A tilting lcd screen is also something I really wish they had on this camera, the might mitigate some of the bright light usage issues and also make it easier for tripod use. I am not sure how well their optical finder works, as it was not included.
So in conclusion, it is capable of amazing images if used with care and some tolerance of quirks. In other words a nice camera that will have an appeal for those who can appreciate a niche camera. If you are looking for a snappy point and shoot to chase the cat around the house, this is not the camera for you. If you are looking for a camera that will challenge you to get the best images you can get, then you have room in your bag of tools for this camera.
I still have a backlog of images to process but here are few more samples. Click on any of the images to see a larger version. Feel free to contact me with any questions, and if you are with Sigma and want a tester…….. be happy to help. Thanks for reading.
UPDATE: 30 July 2014
I just wanted to clarify a few things. In my look at the DP2 Quattro I was wrong about the blinking highlights, those can be viewed during the review process, I read about it in the manual, when I get the camera I will be sure to enable it. The other thing is that Sigma is making a release for this camera, it plugs into the USB port and is relatively cheap to purchase, it is a simple button with a hold function
Sigma has also announced that within the next two weeks there will be a camera firmware update and an update to SPP, hopefully that will clear up a few of the bugs.


Another year bites the dust…….
Well another year is in the process of slipping into the record books. Overall I think it was a good year, there is always room for improvement but in general things went ok. I am left filled with my usual feelings of not getting everything I wanted to get done, done. Oh well that is part of life’s rich pageant. I think having lots of tasks makes for a busy and fulfilling life, so I am not too worried that not everything was finished, they will be added to the next year’s agenda.
I am not usually one for lists or making “resolutions” but I try to set goals for myself, a subtle but real difference for me. Resolutions always seem like they are more trivial to me, easily broken and ignored. Perhaps they should have more staying power and meaning but that is not what happens. They seem easier to rationalize breaking.
Some of the things I want to accomplish in this coming new year, and in no particular order. I need and want to revamp this website, I really need to add some images and replace a lot of them with better versions and better compositions. I also am going to try and write more articles and perhaps that will get down to a lot more commentary but the goal is to be a lot more active with the blog. I have not done a lot to promote it, mostly because I think the site still needs a lot of work. I also want to refine my image post processing, take my time to do what is best for my sense of vision. I want to refine my vision and be more deliberate with my art. Do more starscapes, and also do more photography in general, but then I always want to do more photography! It is a standard year to year wish, and pretty much goes without saying…..
I also want to make better and more productive use of my time. Time is fleeting and never seems to be a lot of it left at the end of the day, but I want to make it memorable and productive.
It is always easier to second guess and have perfect hindsight, but I am really lucky to have my family, friends, and a decent job. I am also especially lucky to have my wife. She is my companion, fellow photographer, friend, lover and confidant that gets me back on track and helps me stay focused.
And I will leave you with the last sunset for me this year and best wishes to all and hope that the New Year will bring much pleasure and happiness.
Thanks for reading. I will leave you with the last sunset for me in 2014…..